

How to Graft a Japanese Maple
Japanese maple cultivars are typically propagated from graft. A Japanese maple graft is a scion that is cut from a cultivar and is united onto a Japanese maple stock. The stock is typically Acer palmatum, which is simply a Japanese maple seedling, however there are a few other viable stocks as well.
Why Graft a Japanese Maple?
People ask this question all the time. Why does a Japanese maple need to be grafted? The answer is two-fold. For one, Japanese maple cultivars rarely grow well on their own roots. While many plants can be rooted by taking a cutting from a tree and placing the cutting in a rooting hormone, Japanese maples don’t have much success with this method. The other reason is that these cultivars also don’t sprout from seed. Many Japanese maples do carry seeds, however these seeds usually become nothing other than Acer palmatum, the typical Japanese maple seedling. In other words, the seeds generally take the form of the stock rather than the scion. Grafting a Japanese maple onto a strong, healthy stock creates a near clone of the cultivar that the scion was taken from. Each individual tree will of course carve its own path in life, but while these trees can vary to a degree, they will share general characteristics that we can predict.
How to Cut and Prepare Scions
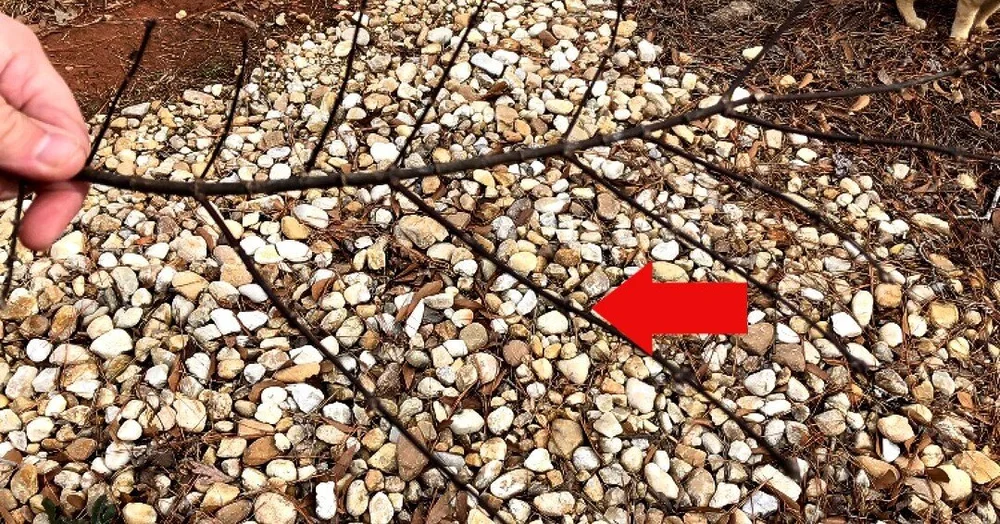
When choosing which branches to use as your scions, it’s often best to start by cosmetically pruning your tree. Once you take off the unwanted branches, you can pick through to see if any of these branches have potential scions. When selecting scions, you are looking for one year’s worth of growth that has been hardened off. Quality scions will have at least two bud nodes, but it is better to select scions with 3 to 5.
Once we have collected our scions, we wrap them in a wet paper towel and store them in the refrigerator. The storage time can vary depending on when we can get around to grafting them, but we at least store them for 24 hours and sometimes as long as a week. This process helps to keep the scions hardened while also keeping them fresh until it is time to graft.
Pre-Grafting Set Up

Making sure that everything is ready for grafting before actually getting started is a very important step in the process. First we have to make sure that our grafting knife is sharp. There’s an old adage that says the number one key to grafting is a sharp knife. We typically sharpen our knives at the beginning of each grafting session. Our next step is to clean everything. We sanitize our hands, we clean our knives and each scion with rubbing alcohol, and we clean the grafting area of each rootstock with alcohol as well. Once everything is clean we can begin grafting!
How to Graft a Japanese Maple
We use a side veneer grafting style here at Maple Ridge Nursery. That means we make cuts to both the rootstock and the scion and then attach the scion into the side of the rootstock. To begin, we have to make a wedge at the tip of the scion so that it will fit properly into the side of the rootstock. The wedge cut has to be smooth and come to a perfect point at the tip.
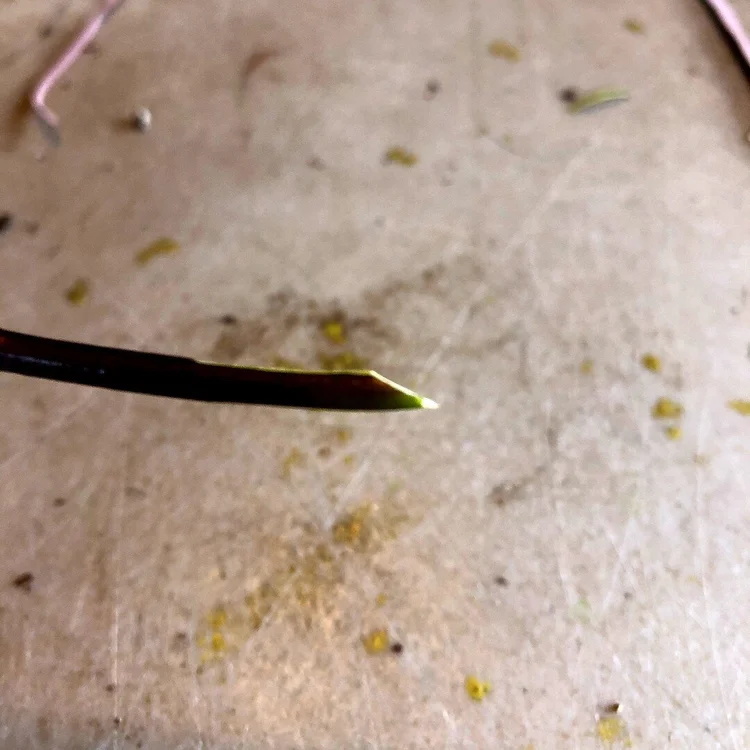
Wedge cut coming to a perfect point
Then, we will make what we call a safety cut on the short side of the scion. This is a thin and smooth cut that exposes the cambian layer. This is a secondary cut that usually doesn’t matter but we make it just in case the primary side does not take to the rootstock. The safety cut will then have the possibility to form with the outer flap of the rootstock. Of course the safety probability is quite low, but we want to give the tree every chance it can to take.
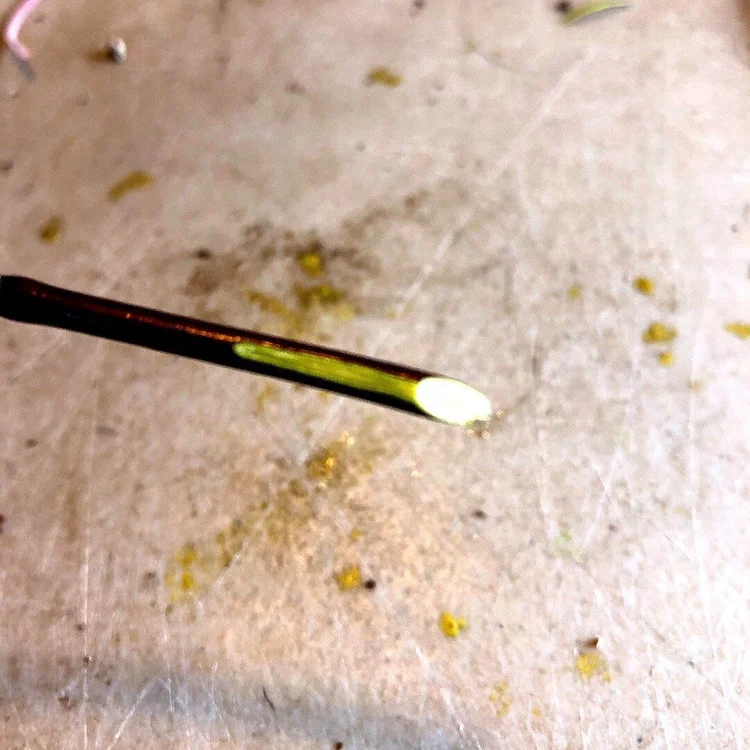
Safety cut exposing the cambian layer
After we make our safety cut, we flip the scion over 180 degrees and make our primary cut. The primary cut should be a thin, smooth cut about as long as the safety cut. This is the cut that matters the most in the grafting process. It is imperative that this cut is smooth, exposes the cambian layer, and extends all the way to the tip of the scion.
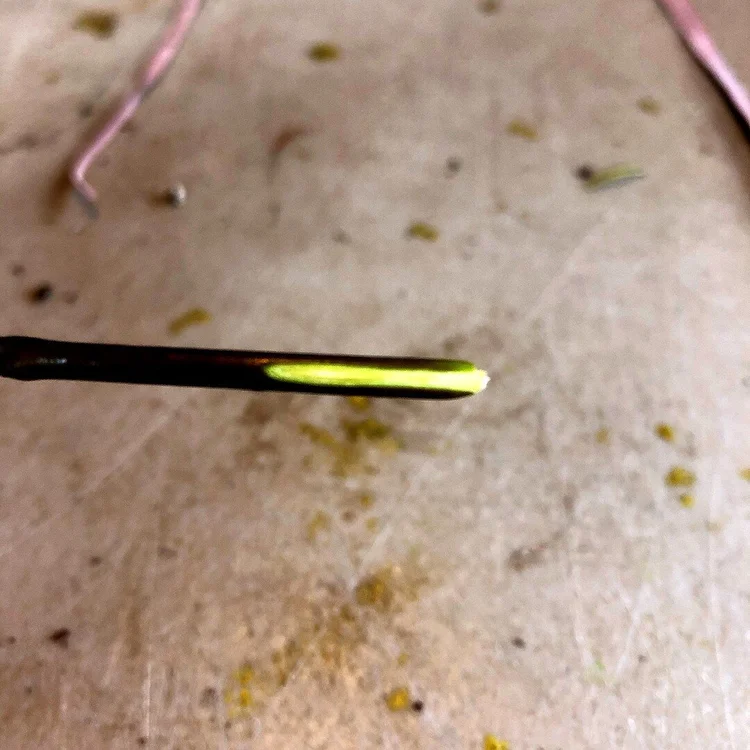
Primary cut exposing the cambian layer and extending to the tip
Once we have made our cuts to the scion we can then make our cut to the rootstock where we will create the pocket in which the scion will be placed. The cut on the rootstock is pretty much as important as the primary cut on the scion since this is where the scion and rootstock will form together. The length of the rootstock cut should correspond to the length of the main scion cut. This cut is thin as well in order to just expose the cambian layer, however you want the rootstock cut to get increasingly deeper as you go so that a pocket will form. This pocket is important as it helps to keep the scion in place when tying them together.

Cut on the root stock forming a pocket for the scion
Where we make the cut on the rootstock is entirely dependent on the variety of Japanese Maple that we are grafting. Coral bark Japanese Maples are grafted as low as possible as to make the most of the bark interest. Weeping varieties are either grafted high to create an umbrella effect or low so that they can be trained with lower branching. Upright varieties are typically quite flexible.
Once all the cuts are made, we place the scion snug into the pocket of the rootstock with the primary side aligned with the rootstock. We have to make sure that the scion is positioned properly and the cambian layers of both scion and rootstock are matched up. After everything looks good we can wrap the graft so that it stays put and forms together. Many people use grafting tape, but I will swear by grafting rubber bands. These rubber bands are much easier for us to use and they disintegrate over time.
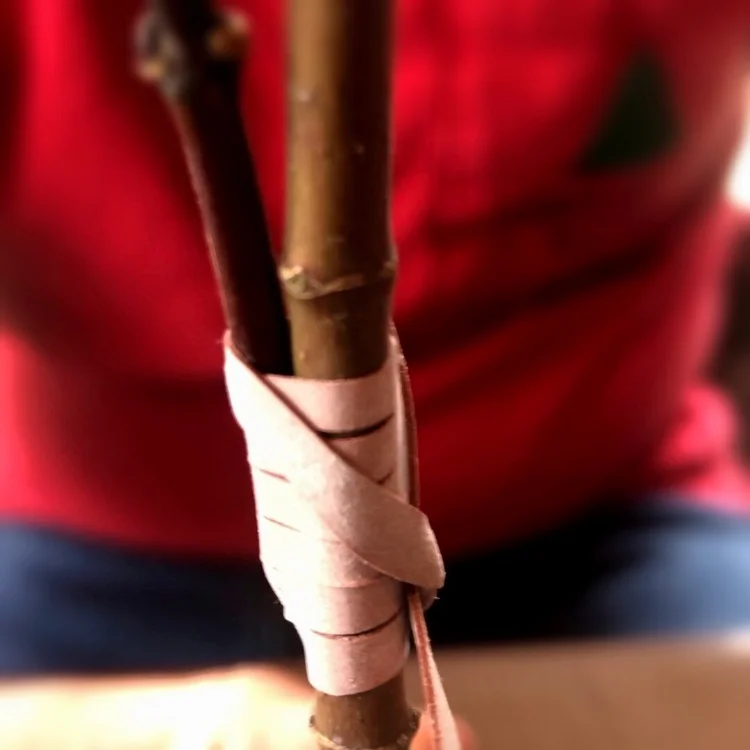
Final Graft with rubber band tied tight
Post-Graft Care for Japanese Maples
The after care for Japanese Maple grafting seems to be where many people diverge. There are many different methods and it’s hard to say if there is a correct one. We are always experimenting and looking for ways to do things better, so I am not going to pretend that our way is the end all be all. I am simply going to describe how we handle after care for our grafts.
Once we have finished a flat of grafts, we label and date them as well as mist them with water. We then place them in a covered greenhouse during winter grafting or in a shade house during the summer. Regardless of season, they are placed under a misting system where they are misted several times per day.
After about a month has passed, the newly grafted trees will begin to leaf out. We will keep them under the same mist system until they begin to push out new growth. Once that happens, we cut back the root stock and place the trees under less water. It takes about a year before we are confident enough in a graft to transplant the plant into a bigger pot.
If you want more information on grafting, schedule a grafting class with us where we will take you through every step in the process. You even get to take home your grafted trees! You can email us at themaplefarm@msn.com to schedule your class. We graft in the winter and summer time and each season has its own benefits and drawbacks. We love these grafting seasons as it is our chance to make new Japanese maples! Each season we always look to graft new and exciting trees that we think everyone will love.